Create a new group
1. Register a user to lino.
Click here to register a new user.
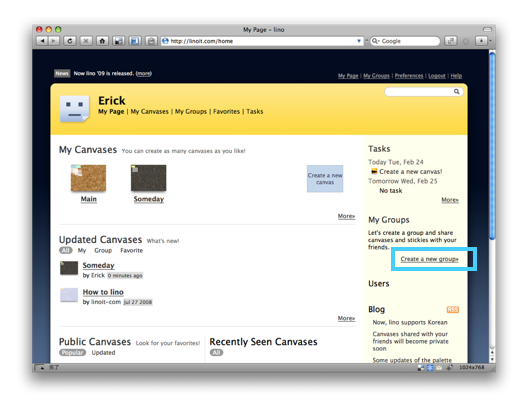
After registraion is completed, you’ll see My Page.
2. Create a new group.
By clicking ‘Create a new group’ in My Page, you’ll see the following page.
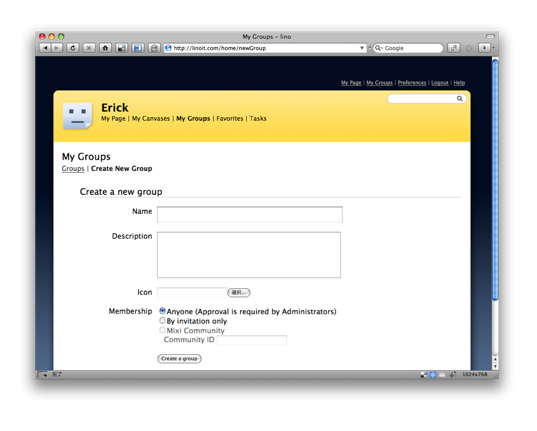
Name:
Input the name you want to create a group with.
ex) lino fan
Description:
Input some descriptions to explain what the group is for.
ex) This is a group for lino users.
Icon:
You can specify an icon for the group.
Membership:
When you create a new group, the group page for it will be also created. When you select ‘Anyone’, everyone can apply to join the group from the group page, which will be approved by the administrators. Since everyone can see the group page, you can post the URL of the group page to blogs, BBS, mail or other services to let them know about the group.
When you select ‘By invitation only’, only those who the administrators invite can join the group. Only members and invitees can see the group page. If you don’t want to let others know about the group such as its name and members, use this way.
You can invite new members by their Email addresses.
Once you click ‘Create a group’ button, you’ll see the page to invite new members.
3. Invite new members.
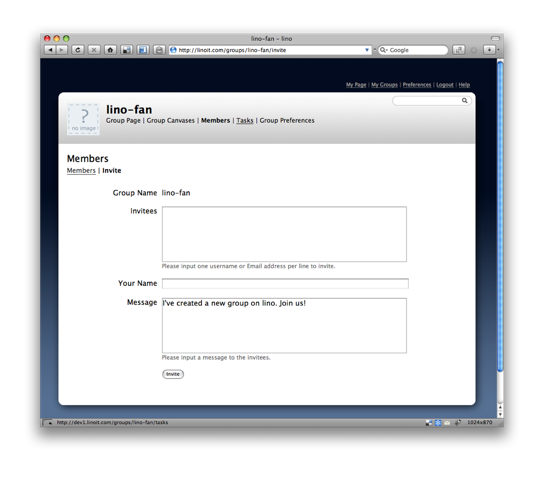
Invitees:
Input Email addresses of people that you want to invite. You can specify multiple Email addresses at once.
ex)
user1@mydomain.com
user2@mydomain.com
user3@mydomain.com
Your Name:
Input your name.
Message:
Input your message for invitees.
Now you finish creating a new group.
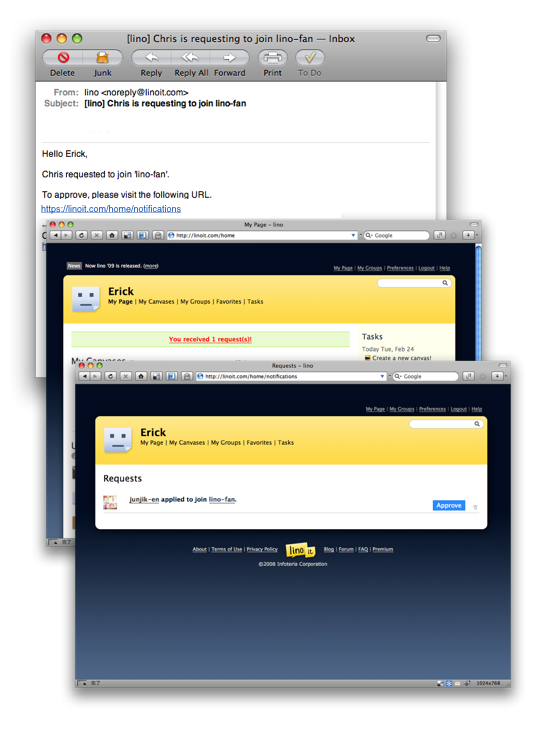
If you chose ‘Anyone’ when you create a group, you need to approve applications. When a new member apply to join, applications will be listed at the requests page, so approve them. You’ll receive notification mail if your Email address has already been verified.